
If you have a new website and want to earn money from advertising, Google AdSense is the first programme most publishers try. The application looks simple, but many new sites are rejected because they applied too early, before the site had enough original content, the required pages or a clean design. This guide explains how to apply for Google AdSense for a new website, what Google actually checks, how to prepare your site so that you have the best chance, how to connect your site step by step, what to do while you wait, and how to fix the most common rejection reasons.
One point before we start. Nobody can promise you AdSense approval, and you should be wary of any article, course or seller that promises a 100 percent approval guarantee. Google reviews every site against its programme policies, and the decision is Google’s alone. What you can do is remove the most common problems and give the reviewer a site that is clearly useful, honest and easy to use. Screens and menu names in AdSense change from time to time, so your account may look slightly different from the screenshots in this article, but the steps remain the same.
Table of Contents
What Is Google AdSense and How Does It Work?
Google AdSense is an advertising programme that lets website owners show ads on their pages and earn a share of the revenue. Advertisers bid to show their ads through Google’s advertising systems. When a visitor views or clicks an ad on your website, depending on the ad type, you earn a portion of what the advertiser pays. Google pays the publisher once earnings reach the payment threshold.
- You provide the website, the content and the visitors.
- Google provides the ads, the auction between advertisers and the payment system.
- Your earnings depend on your traffic, where your visitors live, the topic of your content, the ad placement and how many visitors actually see the ads.
Income from AdSense grows with traffic and content quality. A brand new website with a small audience will earn very little in the beginning, so approval is the start of the journey, not the end of it.
Who Can Use AdSense? Eligibility Requirements
Before you invest time in preparing your site, make sure you meet the basic eligibility conditions.
- Age. The AdSense account holder must be at least 18 years old, or the age of legal majority in their country if it is higher. If you are younger, you cannot open the account in your own name, and you should not try to work around this rule. A parent or legal guardian would need to be the account holder and take responsibility for the account and the payments.
- One account per person. Google allows one AdSense account per person or business. Opening several accounts can lead to all of them being disabled.
- A website you own or control. You must be able to add code to your site and you must own the content. Some free hosting platforms do not allow AdSense ads, so check the rules of your platform.
- A Google account and a valid address and payment details. You will be asked for your name and address, and later for identity, address and tax information depending on your country.
- A supported country and language. AdSense is available in most countries, and your content should be in a language that AdSense supports. Check the current lists in the AdSense Help Centre.
- Content that follows Google’s policies. This is the most important condition, and it is explained in detail below.
How Long Should You Wait Before You Apply?
Many older guides say you must wait 15 days, 30 days or six months, or that you need a fixed number of posts or visitors. Google does not publish a minimum site age, a minimum number of posts or a minimum traffic level as a requirement. What matters is whether your site is ready and meets the policies at the moment of review.
As a practical guideline, not a Google rule, most publishers who are approved on the first attempt have a site that has been live for some time, has a good number of original, well written articles (often 15 to 30 or more, depending on the niche), has a clear structure and includes the standard pages listed below. If your site has only a handful of short posts, it is better to publish more helpful content first than to apply early and be rejected. There is no fixed penalty for being rejected, but each rejection costs time and you will need to fix the reasons before requesting another review.
Preparation Checklist Before You Apply
Use this checklist. If you can honestly answer yes to every item, your site is in a much stronger position.
1. Original, helpful content
- Every article is written by you or a person you work with, not copied, spun, machine-translated or lightly edited from another website.
- Each article answers a real question and gives information a reader can use: clear steps, examples, comparisons or your own experience.
- Articles are long enough to cover the topic properly. Length itself is not a requirement, but a page that has only a few lines rarely gives readers enough value.
- The content is focused on a clear topic or a few related topics, and not a random mix of unrelated subjects.
- There are no thin or repeated pages, and no old posts that are outdated or misleading.
- Text is well written, with correct spelling and grammar, and is easy to read on a phone.
2. Essential pages
- About page: who runs the site, what it is about and why readers can trust it.
- Contact page: a working email address or contact form.
- Privacy Policy: it must explain what data you collect, how cookies and third-party advertising work, and it should mention Google’s use of cookies. Generic templates are acceptable only if you adapt them to your site.
- Disclaimer and Terms of Use: not always required, but useful, especially for finance, health or legal topics.
3. Clear navigation and design
- A visible menu that lets visitors reach your main categories and the essential pages.
- A clean, readable layout without large blocks of ads, pop-ups or content that jumps around.
- No broken links, no empty categories and no pages that say Coming Soon or Under Construction.
- A design that works properly on mobile devices.
4. Technical basics
- Your site loads over HTTPS with a valid security certificate.
- It loads quickly and is available at all times. A site that is often down can be rejected.
- You use a domain name that you own. A custom domain is generally a better choice for a serious project.
- Your site is verified in Google Search Console, your XML sitemap is submitted and your pages can be indexed. Make sure that your pages are not blocked by robots.txt or a noindex tag.
5. Policy compliance
Read the AdSense Program Policies and the Google Publisher Policies. In summary, your site must not contain or link to:
- Adult or sexually explicit content.
- Violent, hateful, harassing or dangerous content.
- Illegal products, drugs or content that promotes illegal activities.
- Copyrighted material that you have no right to use, such as pirated films, software or copied articles.
- Tools or instructions that help people to hack, cheat or bypass paid services.
- Misleading or deceptive content, such as fake news, false promises of easy money or fake job offers.
- Content whose main purpose is to show ads, with little or no value for readers.
Pay special attention to topics where accuracy matters: health, finance, legal advice, jobs and visas. If you write about them, cite official sources, keep information current and do not make guaranteed promises.
6. Ad and traffic practices
- Do not buy traffic from cheap traffic sellers or use bots. Artificial traffic can lead to an account ban.
- Do not use pop-under ads or disguised redirects on your site. Some other ad networks conflict with AdSense policies, so check before you combine them.
- Never click your own ads and never ask others to click them.
Step-by-Step: How to Apply for Google AdSense
Step 1: Sign up
Go to the official AdSense website and sign in with the Google account you want to use for payments and for managing the account. Choose the account carefully, because it is difficult to change later. If your site runs on a platform that offers a built-in AdSense link, such as Blogger, you can also start from its Earnings menu.
Step 2: Enter your website address
Type the URL of your site exactly as it appears in the browser, for example https://www.yourwebsite.com. Use the version of the address that your site actually loads on. Then choose whether you want to receive helpful customised tips and suggestions by email, which is optional.
Step 3: Select your country and accept the terms
Choose the country where you live and where your payment will be sent, and accept the AdSense Terms and Conditions after you have read them. The country you choose affects the tax forms and the currency.
Step 4: Add your site to AdSense
After signing up you will be taken to the AdSense dashboard. Open the Sites section and add your website if it is not already listed. AdSense then gives you the ways to connect your site.


Step 5: Connect your site to AdSense
Google offers up to three ways to prove that the site is yours and to prepare it for review. Choose one of them.
- AdSense code snippet. Google gives you a short piece of JavaScript that you paste into the
<head>section of every page. This is the most common method. - ads.txt snippet. You can add a line of text to a file called ads.txt in the root of your website. You will need this file later anyway, so it is a good idea to add it as soon as you can.
- Meta tag. A single line in the
<head>section that verifies ownership without adding ad code.
How to add the code snippet to WordPress
There are two safe ways to add the code to your WordPress site.
Option A: Use a plugin. The easiest and safest way is to use a plugin that can insert code into the header, or Google’s own Site Kit plugin, which can connect AdSense to your site. A plugin keeps the code in place when you change or update your theme.
Option B: Edit the theme header. If you prefer the manual way, copy the code from AdSense, log in to the WordPress dashboard, go to Appearance, and open the Theme File Editor, then open header.php and paste the code just before the closing </head> tag. Save the file. Because this file may be overwritten when the theme is updated, use a child theme, and always keep a backup before you edit theme files, because a small mistake can break your website.


After adding the code, return to AdSense and click the checkbox that says you have placed the code on your site, then choose Verify. If verification fails, clear your cache, make sure the code appears in the source of your homepage (view the page source and search for the publisher ID), and try again.
Step 6: Add your ads.txt file
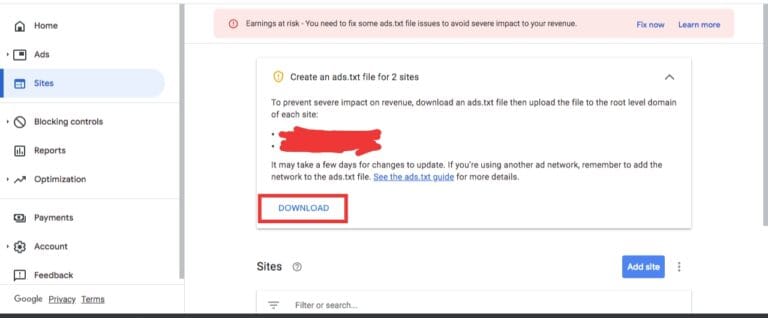
Google will ask you to add an ads.txt file to your site. It lists the sellers who are authorised to sell your ad space and helps protect you from fraud. You can add it with the AdSense-provided text through a plugin or by creating the file in your site root.
Step 7: Set up consent messaging if needed
If your site has visitors from the European Economic Area, the United Kingdom or Switzerland, Google requires that you use a consent management platform that meets its requirements before serving personalised ads. AdSense has a built-in privacy and messaging tool that can help. Set it up before the site goes live with ads, and check the current rules in the Help Centre.
Step 8: Submit the site for review
When you have connected the site, choose the option to request a review. Google’s systems and reviewers then check your site. Do not change your domain or remove the code while the review is running.
What Happens During the Review?
The review usually takes a few days, but for some sites it can take a couple of weeks or longer. You will see a status for your site in the Sites section: for example Getting ready, Needs attention or Ready. Google also sends an email when the review finishes.
- Getting ready: Google is still checking your site.
- Needs attention: There is a problem, for example the code is missing, the site is not available or the site does not meet the policies. Read the message carefully.
- Ready: Your site is approved and ads can be shown.
While you wait, keep publishing new original articles, do not add ads from other networks, and do not make big design changes. Avoid clicking on any test ads.
Common Rejection Reasons and How to Fix Them
| Reason shown | What it usually means | How to fix it |
|---|---|---|
| Low value content | The site has little or no unique value, or pages look thin, copied or automatically generated. | Rewrite or remove weak pages, add detailed original articles and useful examples. |
| Valuable inventory: no content | Google could not find enough content to show ads next to, or pages are hidden, blocked or empty. | Make sure your posts are public and crawlable, and add more content. |
| Site down or not working | The reviewer could not open the site, or it showed errors. | Fix hosting problems, remove maintenance mode and check that the site loads for everyone. |
| Site under construction | Pages show Coming Soon or placeholders. | Remove unfinished pages or fill them with real content. |
| Navigation or site structure issues | Visitors cannot find pages easily. | Add a clear menu, categories and links to the About, Contact and Privacy pages. |
| Policy violation | The site has content that is not allowed by the programme policies. | Read the policy named in the message, remove the offending content and request a new review. |
| Copyright issues | Content or images belong to someone else. | Replace them with your own or properly licensed material and remove copied text. |
| Ownership not verified | Google could not confirm that you own the site. | Re-check the code or meta tag placement. |
After you fix the issues, use the option in your AdSense account to request another review. Do not request repeatedly without changing anything, because the result will be the same.
What to Do After Approval
- Add your ads.txt file if you have not done so already and check for warnings in the Sites section.
- Choose the ad format. Auto ads place ads for you and are the easiest choice for beginners. You can also create ad units and place them manually in the content, in the sidebar or between sections.
- Do not overload your pages. Too many ads slow the site down, annoy readers and can cause policy problems. Place ads where they do not cover the content or confuse the reader, and never label them in a way that pushes people to click.
- Verify your identity and address if Google asks you. Depending on your country, this can include a PIN mailed to your address after your earnings reach a set amount, or a photo ID check.
- Add tax information and payment details. You must provide the correct tax details, and you choose a payment method available in your country.
- Understand the payment threshold. Google pays only after your balance reaches the threshold, which is commonly 100 US dollars or the equivalent in your currency. Check the current threshold for your account.
- Monitor the Policy centre. Warnings appear there. Fix them quickly to avoid ad limits or suspension.
- Keep improving your content and speed. Better content and faster pages lead to more visitors and a better ad performance over time.
Mistakes That Can Get Your AdSense Account Banned
- Invalid clicks: Clicking your own ads, asking friends or family to click, using click farms or automatic tools, or using text such as Click here on ads is prohibited.
- Buying fake traffic: Artificial visitors do not see or care about ads and usually cause invalid activity.
- Modifying the ad code: You must not change the code in ways that are not permitted.
- Placing ads on unsuitable pages: Ads on error pages, thank-you pages, login pages or pages with little content are not allowed.
- Multiple accounts: Opening a new account after a ban is a violation.
- Sharing your account or password: Only the account holder should manage the account, and access should be given only through the proper user settings.
- Ignoring emails: Read every message from Google. Deadlines to fix issues can be short.
Beware of Approval Scams
Some websites, groups and videos claim that they can get your site approved for a fee, provide a ready-made approved account or sell an account with hidden loopholes. These offers are not from Google and are usually scams or violate the rules, and an account obtained this way can be closed at any time, taking your earnings with it. Never share your AdSense login or the verification codes with anyone who is not you.
Frequently Asked Questions
Is AdSense approval free?
Yes. Google does not charge any fee for applying to AdSense or for using it.
How many articles do I need before applying?
Google does not state a fixed number. Publishers commonly aim for a solid set of original, helpful articles, for example 15 to 30 or more depending on the niche, but quality matters much more than the count.
Do I need a lot of traffic to be approved?
There is no official traffic requirement. You need a website that is complete and meets the policies. Traffic mostly affects how much you will earn after approval.
Can I apply with a free blog or a free subdomain?
It can be possible on some platforms, such as Blogger, but many free platforms do not allow AdSense. A custom domain gives you more control and is usually preferable for a long-term site.
How long does the review take?
Often a few days, but sometimes up to several weeks. If your site stays in Getting ready for a long time, check your account for messages and make sure the code is still on your site.
What if I am rejected?
Read the reason, fix it, improve the content and request a new review when you have made real changes. Do not give up. Many publishers are approved on a later attempt.
Can I use AdSense together with other ad networks?
Often yes, but each network has its own conditions and some are not compatible with AdSense policies. Read the rules of both networks before you combine them.
Can I show AdSense on a site with content in Hindi or Urdu?
AdSense supports many languages, but you should check the current list in the Help Centre. Whatever the language, the content should be clear, original and correctly written.
Can I apply if I am under 18?
No. The account holder must be at least 18, or the legal age in their country. A parent or guardian can open and manage the account instead, and they must be the ones who accept the terms and receive the payments.
What is the best time to add ads?
Only after the site has been approved and the code is properly connected. Placing ad code before approval is not needed and can be confusing.
Conclusion
Getting approved by Google AdSense is much less about tricks and much more about building a real website that helps real people. Publish original, well researched content, make sure your About, Contact and Privacy Policy pages are in place, keep your navigation clear and your site fast and secure, and avoid anything that could violate the policies. Then sign up, connect your site with the AdSense code, add ads.txt, set up consent messaging where required, and submit the site for review. If you are rejected, treat the message as a checklist, fix the problems and try again. Approval is only the beginning, and steady, honest work on your content is what turns AdSense into a real income over time.




Smart Gyan Share separates reported information from general guidance. Where an employer, salary, visa rule or other figure is not confirmed by an authoritative source, we do not present it as guaranteed. Readers should verify time-sensitive details before applying or making a financial decision.